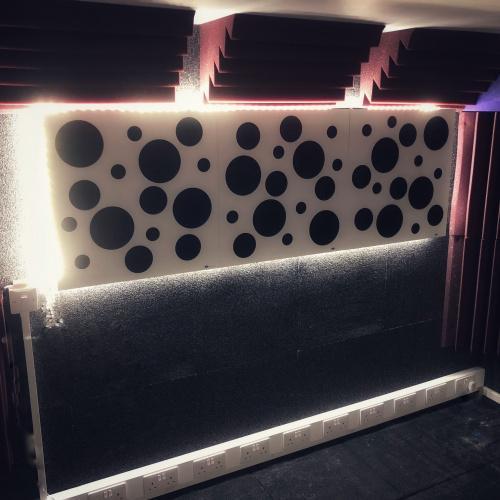
Rob Small Mastering is an Audio Mastering Suite based in Leeds, they specialise in a range of mastering services that range from stereo mastering, vinyl mastering and stem mastering for pre-mixed music projects. The studio has both digital and analogue solutions that cater to the expansive world of electronic music, you can find out more on the specifics below.
“We run an affordable analogue & digital mastering solution that caters primarily for electronic music; using a combination of high-end analogue mastering equipment with the highest quality software in a perfectly designed studio to achieve a clean, warm sound. We concentrate on stereo width, definition, sound character, mixing, and bringing out the finer elements in a mix, rather than just making your records sound unnecessarily loud and over compressed – like some mastering engineers and online automated mastering services do at the moment.” http://robsmallmastering.com/studio
iKoustic were contacted to assist Rob with this brand new studio build in a dedicated external outhouse, this meant that a robust acoustic system would need to be sought after on all walls, floor and ceiling; including any doors to dramatically reduce the expected high volume levels that these audio reproduction systems output, these levels are often found in excess when compared to common household noises. The outhouse was constructed out of a concrete breezeblock with two fire doors, a metal sheeting with joists on the roof area all on top of a concrete foundation.
If you are looking to build your own audio suite, we would recommend doing a little research in to how soundproofing works, as well as looking at our guides to soundproofing walls, floors and ceiling, and our other studio build with Pro Tools Expert – to which they have gone into great detail with their experience of soundproofing with what they had learnt and budgeting for such a project.


Summary
- 3.5m x 3.5m x 2.5m
- A dedicated outhouse
- Using the space as an audio mastering suite
- Neighbours in close proximity
Solution
Our discussion with Rob resulted in sourcing our highest performing soundproofing systems and tailoring them to ensure that the potential for disruption to locals would not arise, simple acoustic systems on a tight budget would not be sufficient in this case, and this goes for most spaces that focus on sound reproduction, spaces that include mixing and mastering studios and often cinema rooms, audio mastering studios need to be in regular use to maintain their productivity and profitability, both of which could be hindered if complaints from the local community are put in on a regular basis. With our guidance, Rob had sourced a local installation team to carry out the work, with any questions during the installation phase cleared up to ensure the correct methods were carried out.
A wooden framework was constructed first with Isolation Strips to ensure that minimal contact was made with the structure, this also included independence from the existing ceiling joists so that the contact was, again, minimal.
Home Studio Wall Soundproofing
With the new isolated framework, it was important to make sure the cavities left were treated with Rockwool Acoustic Mineral Wool in a 60kg per cubic meter density to ensure little to no resonance was found in those cavities.
We specified the use of our Acoustic Isolation Clip and Channel system to provide suspension and flexibility to the internal wall, anything that is completely rigid such as fixing plasterboard to the stud frame would allow an increased amount of vibration to travel into the framework, you will always benefit from additional suspension when it comes to acoustic treatment, especially in sensitive audio environments where vibration can hinder the critical listening experience. With our suspended system now in place SoundPlank 19mm was installed, this is very dense plasterboard that is designed for maximum sound attenuation (but cannot be added as a final layer due to the inability to plaster on to).
Secondly, we specified the use of the highest performing Tecsound product – Tecsound S100, to provide additional mass which is an important factor in reducing airborne transmission, if it is cut into large sheets it will help to cover the butts of the SoundPlank 19mm, minimising any potential weak areas in the cutting and sealing process, it is rare to find everything butts up perfectly as slight defects in the build often lend to slightly misshapen spaces. Tecsound also helps to alleviate vibration between plasterboards, which is again, very important in audio mastering studios. Next, our MuteBoard™ 3 is applied over the top of the Tecsound and screwed into the Channel so that there is a stable fix with minimal contact to the framework, with additional layers to help break down frequencies it performs as an upgrade to plasterboard, it still has an acoustic plasterboard finish which allows direct application of skim plastering.
Home Studio Ceiling Soundproofing
With the metal cladding finish, there were concerns raised on the weakness of the ceiling structure with something so lightweight that would allow a large percentage of sound energy through, as well as the metal cladding vibrating with any sound produced, concerning this, we applied a Tecsound S100 directly to the metal ceiling to provide both additional mass to reduce airborne noise and to reduce any problematic vibrations. With the frame that was created prior, our Acoustic Isolation Clip and Channel System in a low profile was first installed with 200mm of Rockwool Acoustic Mineral Wool in 60kg per m3 – the use of a low profile was opted for due to the limited head height of the room. A similar acoustic material composite to the wall was applied but with an Acoustic Plasterboard 15mm affixed instead of the MuteBoard® 3, it is because the foam layer is not suitable for ceiling installations.
Home Studio Floor Soundproofing
Finally, the floor was installed onto the concrete slab – we specified the use of a Pimpled Acoustic Floating Floor to manage fewer contact points with the floor to reduce low-end frequencies transferring into the structure and negating the soundproof walls. A chipboard was installed on top with a perimeter edging strip to butt against, again, leaving negligible contact with the adjacent surfaces for impact and vibration to transfer to – this floating floor strucure was then completed with Tecsound S100 for additional vibration dampening.
Home Studio Door Soundproofing
Two double fire doors were installed prior in a single doorway to reduce noise transfer, doors and windows are always the weakest areas in all soundproofing projects as they present a break in the acoustic system. Although you may want to seek a space with a lot of natural light, it can often lend to poor soundproofing in the long run – leaving all hard work on the overall soundproofing performing poorly or nowhere near to its best ability. Each door was treated with our Perimeter Seal and Automatic Door Drop Seal and Threshold Plate to minimize air gaps are the door fitting, it was then finished with Tecsound S100 to improve the doors mass to improve airborne reduction.
Results
Although no formal acoustic tests were conducted, we received a overwhelmingly postivie review from Rob which is available on our TrustPilot Review and shown below.


